As is our custom, we let our flocks live for three years before we cull them to make room for new layers. Two of our hens went via wagon ride to a Salvadoran neighbor's house the other day. They will become chicken soup this weekend. When the other hens quit laying this fall, they will meet the same fate. We feel grateful to know this neighbor and she is grateful to be gifted with the free meat. She has expressed surprise about the strange American habit of eating chicken without wanting to think about where it comes from or see the process of a live chicken becoming food for humans. We are glad the girls understand the circle of life in an intimate way so they have a greater appreciation for the value of meat. Madeleine hasn't had any desire to eat meat for a couple of years now, and although little Rachel would be quite the carnivore if I cooked it regularly, she has a true appreciation of it's source and it's sacredness.
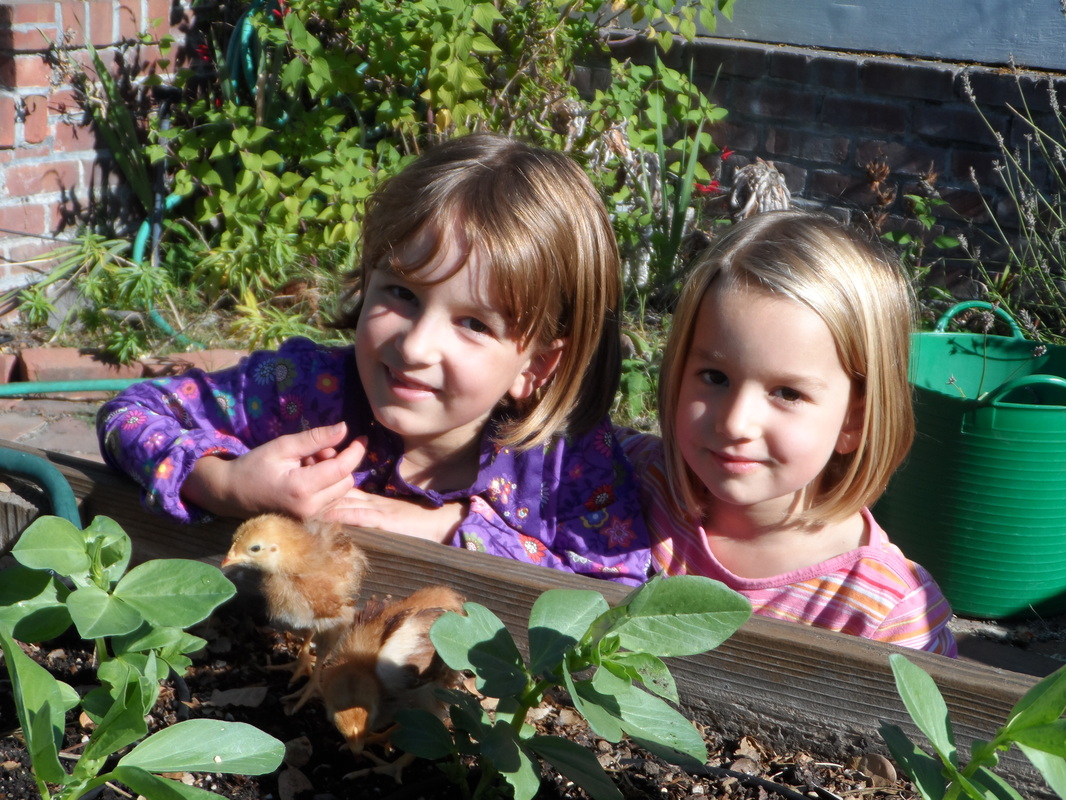
Madeleine and Rachel helped us pick out seven new baby chicks at a feed store as we begin raising our fourth flock of chickens since 2005. This time we chose them by breed and future egg color. We came home with three Rhode Island Reds (light brown eggs), two Ameracaunas (pale blue eggs), one white leghorn (it will become our first white egg layer), and one Welsummer (dark brown spotted eggs). They provided a good eight hours or so of entertainment just over the first weekend that we had them. It reminded us that we have absolutely no need of a television in our house because our girls like to watch "Chicken TV." This week we've had so many visitors coming to see the chicks you'd think we have a new baby in the house. The girls are old enough this time around that they are learning to be the main caregivers. At this point that involves transferring the chicks to a secure brooder outside during the day, bringing them into the house at night (where they sleep in a box, not wherever they please!), refilling their water and feed, and best of all, cleaning up their soiled bedding each day. They've named a few so far: Harry, Lulu, Puffy-cheeks, Agoogamay, and Road-Runner. We are taking suggestions for two more names.
As is our custom, we let our flocks live for three years before we cull them to make room for new layers. Two of our hens went via wagon ride to a Salvadoran neighbor's house the other day. They will become chicken soup this weekend. When the other hens quit laying this fall, they will meet the same fate. We feel grateful to know this neighbor and she is grateful to be gifted with the free meat. She has expressed surprise about the strange American habit of eating chicken without wanting to think about where it comes from or see the process of a live chicken becoming food for humans. We are glad the girls understand the circle of life in an intimate way so they have a greater appreciation for the value of meat. Madeleine hasn't had any desire to eat meat for a couple of years now, and although little Rachel would be quite the carnivore if I cooked it regularly, she has a true appreciation of it's source and it's sacredness.
0 Comments
Ann is helping coordinate the second annual bicycle tour of Alameda chicken coops, which is scheduled for Sunday, May 16 at 1pm. It will also be stopping at our house. The idea came up last year on the Alameda Backyard Chickens Group, and we had about 50 folks attend last year with no publicity. We're expecting a much bigger turnout this year, now that it's being promoted in area newspapers and blogs (it should be in the Chronicle's 96 Hours section this week). The tour will start at 448 Lincoln Avenue, where a map will be provided. The route is about 4.5 miles long and will end at 1342 Grove Street. Join us for a fun afternoon and spread the word! P.S. Ann will also be teaching her introductory class on raising chickens this summer. If you're thinking about getting chickens or know someone who is, it's a great way to get started. Our yard and those of three of our close-by neighbors will be featured on this year's Bay-Friendly Garden tour on Sunday, April 25th. The free, self-guided tour is sponsored by StopWaste.organd includes over 40 gardens in Alameda County, grouped in geographical clusters. Pre-registration is required. Our yard is pretty well qualified, with native plants, rain water catchment, gray water, chickens, bees, food production, and landscaping with salvaged materials. We've been told to expect over 500 people (and perhaps well over that, since registration has been particularly strong so far). There's also a need for volunteers to help out, so sign up if you're interested. Here's a fuller description of the tour from StopWaste: "The 7th annual tour continues to celebrate the diversity of Bay-Friendly gardens. Urban farmers grow abundant harvests of fruit and vegetables, and keep chickens and bees. Native plant enthusiasts embrace the local flora. Salvaged material aficionados blend recycled art into the landscape. Bay-Friendly gardens offer something for everyone—come and discover ideas for creating your perfect haven.... Gardens range from professionally designed postage stamp-sized lots in Berkeley to exuberant one-acre market gardens in Pleasanton." We're pretty excited, although we have a bit more prep to do over the next few weeks. I first reported on our rainwater catchment endeavors back in February of 2009. That post had a lot of good details and references for getting started, but we've learned some things along the way and have settled on an improved method for converting and connecting barrels. Our original approach involved cutting off the tops of the barrels, primarily so we could access the inside more easily. The advantages were that we could clean the insides more easily and install the hose bib more securely. The big disadvantages were that the barrels lost some structural stability (particularly when full), were harder to keep mosquito-proof, lost some capacity, and were not easy to link together. Also, that approach was more work, involved more parts, and was therefore more expensive. Cutting the tops off and getting a nice clean cut was fairly challenging, even though it got a little easier with practice. Not having the most secure top meant we needed an overflow valve in the main part of the barrel. We also spent extra money piecing together washers and makeshift nuts to secure the hose bib from both sides. And then the nuts ended up rusting. Back to the Drawing Board I ended up going back to a very simple approach we had rejected early on: simply drill a hole for the hose bib and screw it in. We had been concerned that the connection would leak or wear over time. I've now converted six barrels with this approach, and I've only had one problem. One has a very slow leak that I'll patch once it's empty. Otherwise, I'm much happier with the new approach. Here are the specs: I drilled a 3/4" hole as close to the bottom of the barrel as possible and screwed in a 1/2" male hose bib. It's a little hard to start screwing it into the hole and you have to be careful to get it in straight, but once it's in it should be pretty secure. I also found sink strainers that insert snugly into the barrel openings. They strain out leaves and other gunk, while keeping bugs out. So that's it. It actually takes me more time to wash out the barrels beforehand than to convert them. That's because while the car wash soap and tire dressing is labeled as being "safe for the environment," I've been pretty particular to make sure none of that drains into groundwater or the bay (since we do live in Alameda). So with each rain barrel upright, I spray the insides with a hose nozzle through one of the top holes. I empty the barrel into a bucket and the bucket down an inside drain. Rinse, repeat. Rinse, repeat. Actually, the 30-gallon barrels fit in my bathtub so it was very easy to clean with a hand shower spray. Linking Barrels I was interested in filling more than one barrel from a single downspout from the beginning, but couldn't figure out a good approach. One of our downspots with the greatest volume output is located at the back of out driveway where there was unused space that was perfect for lining some barrels up. The biggest problem was just a method for connecting them. I read through a number of approaches published online, but none of them were very appealing. They were either more complicated than seemed necessary, or had other downsides. The breakthrough I had was finally finding an adapter that would screw into the (unusually-sized) holes in the tops of the 55-gallon barrels. It is a 2 inch PVC Male Adapter that converts to more standard PVC piping sizes. From there you can reduce down to the size of PVC piping you want and connect up the pieces. I just snapped them together so I can easily remove the piping to clean it or a barrel later on. The downspout drains into a funnel, which I nested a sink strainer in. Each barrel has its own hose bib, so it can be emptied independently. This approach means that we can fill the barrels above the normal fill line, fitting about 65 gallons into the large barrels. So we now have about 360 gallons of capacity! One other note: we mostly have white semi-opaque barrels, but have two blue ones. We had read that an advantage of opaque barrels are that there is less concern with algae growth. The disadvantage is that you can't see what the water level is. We haven't had problems with algae and now have a clear preference for the white barrels. So last month we finally put up my Christmas gift from Ann: a bat house! Hopefully some area bats will discover it, although we probably will have to wait until next summer. Bat's are great... a single bat can eat up to 1,200 mosquitoes in one hour. There are a lot of misconceptions about them and it's often difficult for them to find lodging in urban areas. Being nocturnal, they stay in the bat houses during the day. We spent a lot of time trying to find the best location, as it needed to be placed where it gets plenty of sunlight to stay warm. We ended up placing it along the roof of our old shed. The bats enter from the bottom. Some more bat facts:
We've been doing our best to reduce our water usage, and just took another big step: rainwater catchment barrels. As the San Francisco Chronicle reported last week, California is on par this year for its worst drought ever. In the East Bay, we've had water use restrictions and billing surcharges since August. The idea of rain barrels is to harvest and store the rainwater that is routed down a building's downspouts and use it at a later time. Since we are also expanding our food-producing garden extensively, it will be even more helpful to have extra water on hand to keep it irrigated. The first step was to find a source of 55-gallon food-grade (HDPE) plastic barrels. That type of barrels is used to distribute all kinds of items, including food ingredients (particularly liquids or foods packed in liquids). Sometimes the barrels will be sent back and re-used after they are emptied, but they are often just thrown away. For our purposes, it was also important to get barrels that had not contained toxic substances. They also have to be strong enough to be filled with water, so trash cans generally won't work. We found some barrels for sale onCraigslist in the $20+ range but since we wanted a number of them, we hoped to do better. After a lot of calling around (and talking to a lot of confused people), the only free sources we could find were car washes, which receive their soap in them. The next step was to convert them to rain barrels. I worked with our neighbor Michael to determine the best approach, and we came up with something pretty simple. There are a number of great DIY write-ups online (some listed below), so I'm not going to go into too much detail on ours. Basically, we:
We've converted two barrels so far, and the total cost for parts came out to about $20 per barrel. Example Conversion Instructions (all at instructables.com)
I was an early adopter of Honda's Civic Hybrid, purchasing the initial 2003 model in May of 2002. I'm a little embarrassed to admit that I have already put 100,000 miles on it after only 5 1/2 years. But that was part of the point, as I bought the car soon after taking a new job where I would have to commute about 60 miles round trip each day.
I diligently kept track of the true miles per gallon based on my odometer and the number of gallons I pumped into the car at each fill-up. The following are the results of this tracking so far and some of my conclusions. Statistics At each fill-up I recorded the date, total miles on the odometer, number of gallons of gas, and price per gallon. The majority of my driving was freeway commuting to work, initially between Alameda and Fremont/Newark and later between Alameda and San Mateo. The Civic Hybrid features a real-time MPG meter, as well as two trip meters that track number of miles driven and MPG for the current trips. I generally reset one of the trip meters pretty much whenever I started my car. In late 2004, I started regularly resetting the other when I filled up on gas and adding the reported MPG to my log. I uploaded all this data to the website swivel.com, which generated the nice graphs you see previewed below (they're even nicer if you click through). As an added bonus, they noticed my nice graphs and one of them is currently their featured graph, front and center on their home page. Sweet. Estimated MPG vs. Actual The above graph shows the actual MPG (the lower line, based on odometer and gallons of gas) as compared with the reported MPG (the higher line, based on the trip meter estimate). While they do track together, you can see that the car's real-time estimates are optimistic by generally 3-5 MPG. Variability in MPG There can be a big difference in MPG from fill-up to fill-up, and I think that's largely because a Civic Hybrid driver can greatly affect the MPG based on his or her driving technique. Driving fast and aggressively makes the MPG plummet. If you drive behind a tractor-trailer truck at 58 MPH, you can do very well. The trip meter and real-time MPG gauge are great motivators. Adam, one of my co-workers when I worked in Fremont, bought a Civic Hybrid about the same time I did and we shared a similar commute. For a while we were competing to get a higher MPG on our daily commute (we were regularly getting MPGs in the mid-60s). Unfortunately, I did not often maintain the patience to get the best bang for my gasoline buck. Major trends in MPG You may notice that my MPG increased over time, presumably as I learned to drive the car more efficiently (and perhaps as I broke it in?). My initial commute was a particularly flat route from Alameda to Fremont via I-880. In May 2005, I started commuting to San Mateo which had some negative impact on my MPG. Potential culprits include climbing the incline on the San Mateo bridge, winds on the bridge, and more back-ups (stop-and-go traffic). My overall MPG has so far been 42.97, but it is continuing to trend up over time. MPG by month While not dramatic, the winter months of January and December had the lowest average MPG. That could be a factor of the battery being less efficient when it is colder, or the impact of wind and rain. Cost savings I was very curious when I bought my car what the payback period might be at which the cost difference between purchasing a hybrid over a conventional car ($3000 over a standard Civic) would be paid back by gas savings (not that that is the only reason for buying a hybrid, mind you). Gas prices did go up more than I thought they would over the early lifetime of the car. This is what I paid per gallon: Ah, remember the days of $1.50/gallon? My previous car (a 1989 Civic Hybrid) was getting about 28 MPG when I sold it. I have so far saved about $2,900 over what I would have spent filling up a car of that efficiency. Compared to the 31 MPG a new standard Civic would have gotten (if it actually met its claimed MPG), I would have saved $2,100 so far. Not too bad. My next step: get my MPG numbers back up now that I've shamed myself by posting the results of my inefficient driving. The birch tree in our front yard consistently gets infested with aphids every year, and this year it was hit hard. The aphids suck juices from the leaves and excrete a colorless sticky honeydew. That attracts ants and causes growth of a fungus called "sooty mold" to grow on the leaves. So we have ants marching up the trunk and when we walk across our lawn the soles of our shoes become covered with sticky leaves. It's particularly annoying this year because we just got a little play structure for Maddy to play on under the tree. The tree does not seem to be greatly stressed, but aphids could eventually kill it. In addition to the ants and aphids, we noticed a whole bunch of other strange bugs crawling on the tree (as shown in the photo). After some research, we found that these were lady beetles (also known as ladybugs) in a larva stage. Wikipedia has some good pictures of the various stages (early larva, mid-larva, pupal, and adult), all of which we have seen on our tree. They showed up because they are predators of aphids. In addition to letting the lady beetles do their thing, we are doing our part to combat the aphids. We borrowed a power washer and have been spraying the leaves with water from our rooftop and from the top of a ladder. This knocks many of the aphids off the leaves, and seems to be washing some of the honeydew and mold off. We tried adding a castille soap additive (which will kill aphids on contact), but we couldn't get the power washer to spray that with enough velocity for some reason. While spraying a big plume of water into the tree from my rooftop with a pistol wand feels almost like I'm acting out a scene fromGhostbusters, it gets old pretty quickly (particularly when the wind starts blowing the water right back at me). We've done it once a weekend for the last three weeks, and hear that six weeks may do the trick. Now that we have a plan, we hope to jump on the aphids early next year and head off the problem before it gets bad. We were just looking for a nice wooden toy for Madeleine to play with, but when we brought it home we noticed it is:
Oh, and Maddy thinks it's pretty fun to play with, too. It's been over six months now since we got a tankless water heater installed, so we have a little hindsight now. While we had somewhat of a mixed experience, we are generally happy that we chose it. For those who are unaware, tankless or "on-demand" water heaters work by heating your home's water when you turn on the tap, rather than keeping gallons of water at the desired temperature all the time. They are much more efficient overall, which can result in a lot of savings, since water heating is a big part of one's utility bill. While they have been popular in other countries for years, they are just starting to be noticed in the United States. Here are the main issues... Pros
The biggest gotcha (and surprise) by far was the venting. Technically, you may be able to get away with using normal venting, but tankless water heaters are unique in having code requirements for better venting. Apparently the issue with the tankless heaters running hotter than tank heaters, which can result in condensation in the venting. Because we have a Victorian house with a high roof, this cost us a lot more money. We did gain a closet out of the deal, though. Particularly when we found the cost of the venting, we decided to move the heater into our attic, which freed up a whole closet for storage (Victorians also tend to have limited storage space). The heater came with a remote we can use from our main living area. Overall, I'm glad we went for it... |
Categories
All
Archives
January 2014
|